Wednesday, December 4, 2013

Christmas Burlap Banner


It's been a while since I've been on my blog! I have to thank my absolutely wonderful daughter for that! I spend more time with her because, as every mom knows, they grow up so fast!!

With that said, I, along with many other bloggers, LOVE Christmas and the many DIY projects that go with it!!!

With inspiration from Pinterest I created my own burlap banner!
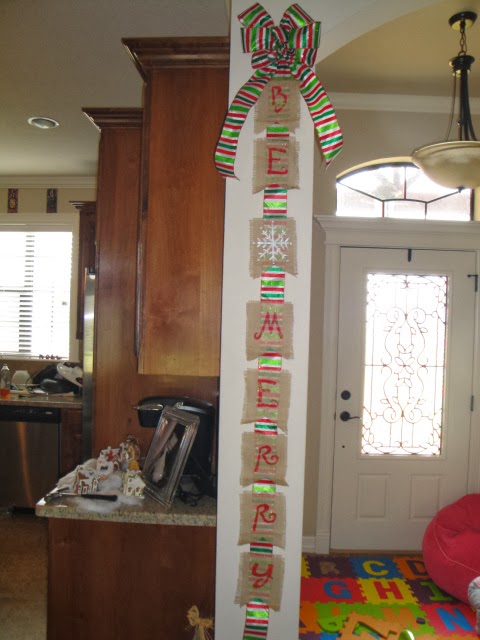
GORGEOUS!
(At least I'm quite proud of it!)


Here is what you'll need:
1/2 yd of burlap (easier if you don't by it by the roll)
Letter stencils (unless you want to do it by hand)                                                           
Acrylic Paint
Circle sponge brush
small paint brush
Christmas ribbon
Ruler
Hot glue
Permanent marker
Scissors
Paper plate
 
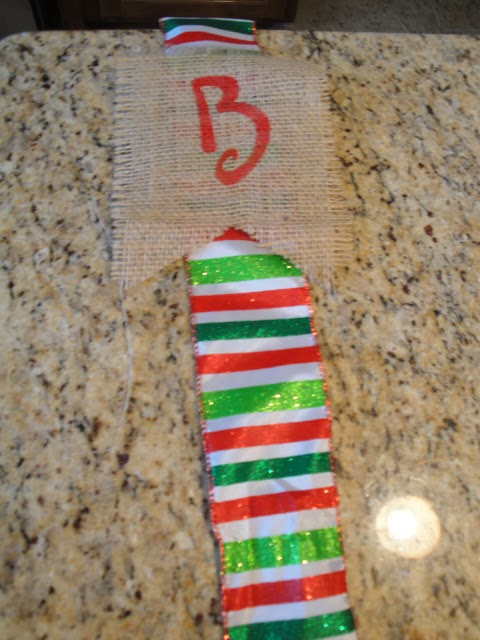
Step 1: Use a ruler and permanent marker and create 5X7 rectangles on your burlap. I needed 7 rectangles for the letters and 1 for the spacer. Your banner can say whatever you want! Get creative; it is Christmas after all!!) Because I cannot measure the same every time with a ruler (don't ask me why), I used a 5X7 card and traced around that with my permanent marker.


Step 2: Use your ruler and along the bottom (short side) mark 2 1/2 inches in and then 2 inches up from that point. Now going from the corner to the dot inside the rectangle, create a triangle. See the picture below :)

 
Step 3: Cut along the line creating banner pieces.


Step 4: Now you are ready to paint your letters. I recommend placing them on a piece of paper just in case the paint bleeds through. I chose for my banner to say "BE MERRY". Center the letters from my stencil pack on to each piece a burlap. Using the circle sponge brush/dabber, dip it in paint then dab onto the stencil. NEVER make a brushing stroke as it will cause you to go outside of the lines on the stencil!! The more paint you use, the darker the letters will be. FYI, it will not take long for the paint to dry.


Step 5: Now paint your spacer using a regular paint brush. I chose a snowflake to go between my words. I didn't have a stencil but I simply Googled snowflake and got my idea from there. It isn't perfect, but you can clearly see it's a snowflake; so I'll take it!!!


Step 6: Once your burlap pieces have dried (it doesn't take long), lay out your ribbon. You will need to leave about 3 inches at the top to add your bow so it doesn't cover up your letter, and a tail at the end. Using your burlap pieces, choose how you want your spacing. I wanted less space between my letters and more between my words. Once they are laid out, hot glue the burlap to the ribbon. Glue on each side of the ribbon instead of in the middle. It will make it look nicer. 


Step 7: Cut your tail so that it has a beautiful triangular point cut out of it!
 
Step 8: Make your bow using the left over Christmas ribbon. You may choose to make your bow as large or as small as you would like. I used THIS YouTube video to help me!
 
Step 9: Hot glue your bow on to the top of the banner. (This is why you need to leave about 3 inches of ribbon at the top)
 
Step 10: Create a loop to hang from a door hanger if you so choose. My banner was too long so I chose to hang in on the wall. To create the loop, just cut a 4 inch piece of ribbon. glue one edge on to the back of the top piece of ribbon. Then loop it around and glue the other edge, creating a loop. The loop should be vertical so it can hang on the hook.


Now you are ready to display your BEAUTIFUL banner around your home!!!


Sunday, April 7, 2013

Crockpot Cream Cheese Chicken Chili

Who doesn't like Crockpot cooking?!? When you are a busy mom, or simply a working woman or man at that, a Crockpot meal is always a plus! This chicken chili is delicious, easy, and a crowd pleaser.

I found the recipe through Pinterest which was linked to Land O' Lakes webpage. I followed the modified  recipe given through Pinterest which does not have a link to the changed recipe. It's very easy, and I was able to freeze the leftovers for a later date!

Ingredients:

2 Frozen chicken breasts
1 can of Rotel
1 can corn, do not drain
1 can black beans, drained and rinsed
1 package Ranch dressing mix
1 Tbs Cumin
1 Tbs Chili powder
1 Tbs onion powder
1 8 oz package cream cheese


Directions:

Place the frozen chicken breasts in the bottom of the Crockpot, then add the remaining ingredients and stir. The cream cheese will remain in the brick until everything has warmed up and then it will begin to melt. Cook on low for 6 hours. Stir before serving; this will shred the chicken.

Serving Suggestion:

I put tortilla chips on the bottom, spooned the chili on top, sprinkled with shredded cheese and green onions.

Very easy and delicious!!

I hope you enjoy it as much as my family did!

Wednesday, April 3, 2013

Creamy Beef Stroganoff

So, for those who don't know me, I am a Pinterest addict! I am constantly repining everything I see that I might like to make. This recipe is no exception! Like many people, we eat with our eyes and the original picture sure caught mine. The original recipe can be found here! It started as a Portobello Mushroom and Kale Stroganoff. However, after grocery shopping, I couldn't find Kale so I decided to add beef instead. I made several changes to the original recipe and there are still more changes I would make the next go around.

Ingredients:

1 white onion
1 Tbs minced garlic
2 Portobello mushrooms (sliced in strips)
1 lbs ground beef
1 Tsp paprika
1 can beef broth
1 Tbs tomato paste
Egg noodles
1 cup of Greek yogurt


If you look at the original recipe, it calls for much more. I would have used 2 cans of cream of mushroom instead of Greek yogurt. I was not a fan of the tangy-ness of the Greek yogurt. I would also keep an extra can of cream of mushroom on hand just in case I wanted more creaminess.

Step 1:

Boil Water for Egg noodles
Brown the onion and ground beef.


 Step 2:

Drain the grease and add the sliced mushrooms


 Step 3:

Add the beef stock, tomato paste, and Greek yogurt (replace Greek yogurt with cream of mushroom), and the paprika. Mix until desired creaminess. I did not reach my desired creaminess and that is why I would replace the yogurt with the cream of mushroom soup.
 

Step 4:

Add the noodles and stir until coated


Step 5:

Serve and sprinkle with grated parmesan cheese and ENJOY!!


This is a meal I would make again and make the above changes! Unfortunately, my husband does not like HATES mushrooms and will not eat this. I will have to make this when he is away for work!. 


Wednesday, March 20, 2013

Getting Started

I've decided to create this blog so my friends and family can recreate many of the things I enjoy making. I have had many requests for recipes and "how did you do that?" questions. As a 1 income family, I am dedicated to shopping and crafting on a budget. My DIY projects and dishes will be inexpensive to create and/or make because we all know money is precious!!

My New Year's resolution was to make one new dish a week for the entire year. I didn't want to do the classic "lose weight" resolution because that can sometimes set me up for failure. The 52 (or more) dishes can include appetizers, main dishes, or desserts. I will post the recipe or sometimes recipes for the week and whether it was good along with changes I would make the next go around. As any good home chef (just a boost of confidence) mistakes are made and we learn to make changes or to NEVER make that dish again!

As for the craft projects, many will include kid friendly crafts because there is nothing better than to create something with your babies! I own a Cricut and sewing machine so some crafts will use these tools. My suggestion is to modify the Cricut projects by using precut shapes and such from, my favorite story, Hobby Lobby. As for sewing projects I don't think you can substitute anything except to hand sew which is time consuming, but possible. If you can hand sew, you are my sewing hero!!

I love feedback and suggestions so please share away!!!

I look forward to this journey and am excited to share my many adventures of crafting and cooking with you!!

Welcome to the Mortashed Family!!

I was recently married in February of 2011 and am enjoying newlywed life. My husband and I have welcomed a beautiful baby girl, Adalynn, into our family in January of 2013. She will be the inspiration behind many of my crafty projects. Thanks to my hardworking husband, I have become a stay at home mom while I put my teaching career on the back burner. Being a mom is extremely rewarding and wouldn't trade it for anything. I love crafting, baking, and cooking as a lot of others do as well. My craft projects will be diverse but simple to follow as I have limited time with a baby on hand. I hope you enjoy these Do It Yourself projects and delicious dishes and baked goods!