Monday, July 28, 2014

Toilet Paper Tube Dragonfly

I'm always looking for fun and easy crafts to do with my daughter that use materials I already have around the house. This is a very easy craft and versatile! Though I used my Cricut machine to cut out the dragonfly pattern, you may use an image from the internet as a stencil.

Materials:

- Toilet paper tube
- Dragonfly pattern (Cricut machine "create a critter" OR google images)
- A piece of scrapbook paper 4"X7"
- Googly eyes
- Tape
- Glue


Directions:

1. Cut out your dragonfly. I used my cricut machine but you can simply find a dragonfly image on google and use that as a stencil. Make it easy on yourself!
2. Measure your scrapbook paper to be 4 inches wide and 7 inches tall.
3. Tape the scrapbook paper around the dragonfly
4. glue the wrapped toilet paper tube onto the body of your dragonfly
5. Glue the googly eyes to the dragonfly.


I allowed my daughter to choose her paper, press the buttons on the Cricut, tape, and glue so she would be involved in every aspect of the project. She enjoyed it and it was simple for her to execute!!!

Monday, June 9, 2014

Father's Day Canvas

Looking for a simple Father's Day craft for a little one to do? This is exactly what you you've been looking for. My daughter, who is 1 1/2, loves finger painting! In fact, she asks to do it all the time. So I thought, why not incorporate her love of painting into a gift for her daddy. We created a canvas he can hang beside the bed.


MATERIALS:

8x10 canvas
finger paints
1 3/4" wooden letters (to spell what you want)
hot glue
picture hangers (found in the framing section of Hobby Lobby)


INSTRUCTIONS:

1. Finger paint the canvas and allow it to dry.


2. Tape the wooden letters to a piece of paper and drop finger paint along each wooden letter. Then finger paint the letters and let dry.


3. Pull the letters off of the paper and arrange on the canvas as desired.
4. Hot glue the letters down on the canvas and let dry.
5. Add the picture hanger to the back of the canvas and you are ready to deliver your gift.


You may also use acrylic paints, but my little one tends to paint everything around her including herself so acrylic paints were a no go for us!!

My daughter made 2 different canvas', one for her Daddy and the other for her Papawl!

Friday, June 6, 2014

Fishing Baby Shower

I was honored to host a baby shower for my dearest friend! Once the gender was revealed as a BOY, the theme was a no brainer!!! The family chose FISHING because that is the dad-to-be's favorite hobby.

I started with my go to idea starter, pinterest. After creating a board and getting my creative juices flowing, I began. This post shows everything I did to transform this theme in to the mom-to-be's dream of a baby shower!

THE BEFORE

A BLANK CANVAS
 

DECORATIONS

The table decorations were simple. I used 2 shades of blue plastic table cloths and alternated between the 4 tables. There was a square fabric topper in the middle. I had a tree trunk cut and used that as the base to hold mason jars that were filled with blue water and bobbers.


Along the wall I had put up different size circles cut with my Cricut from different shades of blue cardstock. Then I use Crepe paper and twisted it along the base to look like seaweed.


Along the ceiling, I draped blue cellophane to appear like waves or water. Then I hung painted paper lanterns to look like bobbers. (I took plain white lanterns and painted the base red). Then I hung paper fish in various primary colors that I cut with my Cricut.
 
The sign in table had a couple of simple diaper cakes, the baby book, pictures, and ribbons for the people to be honored.


I made a decomesh wreath for the door and hung fish fringe from the door way.
 

I made a sign to direct guests to the baby shower and a fishing doc to set the presents on.


FOOD

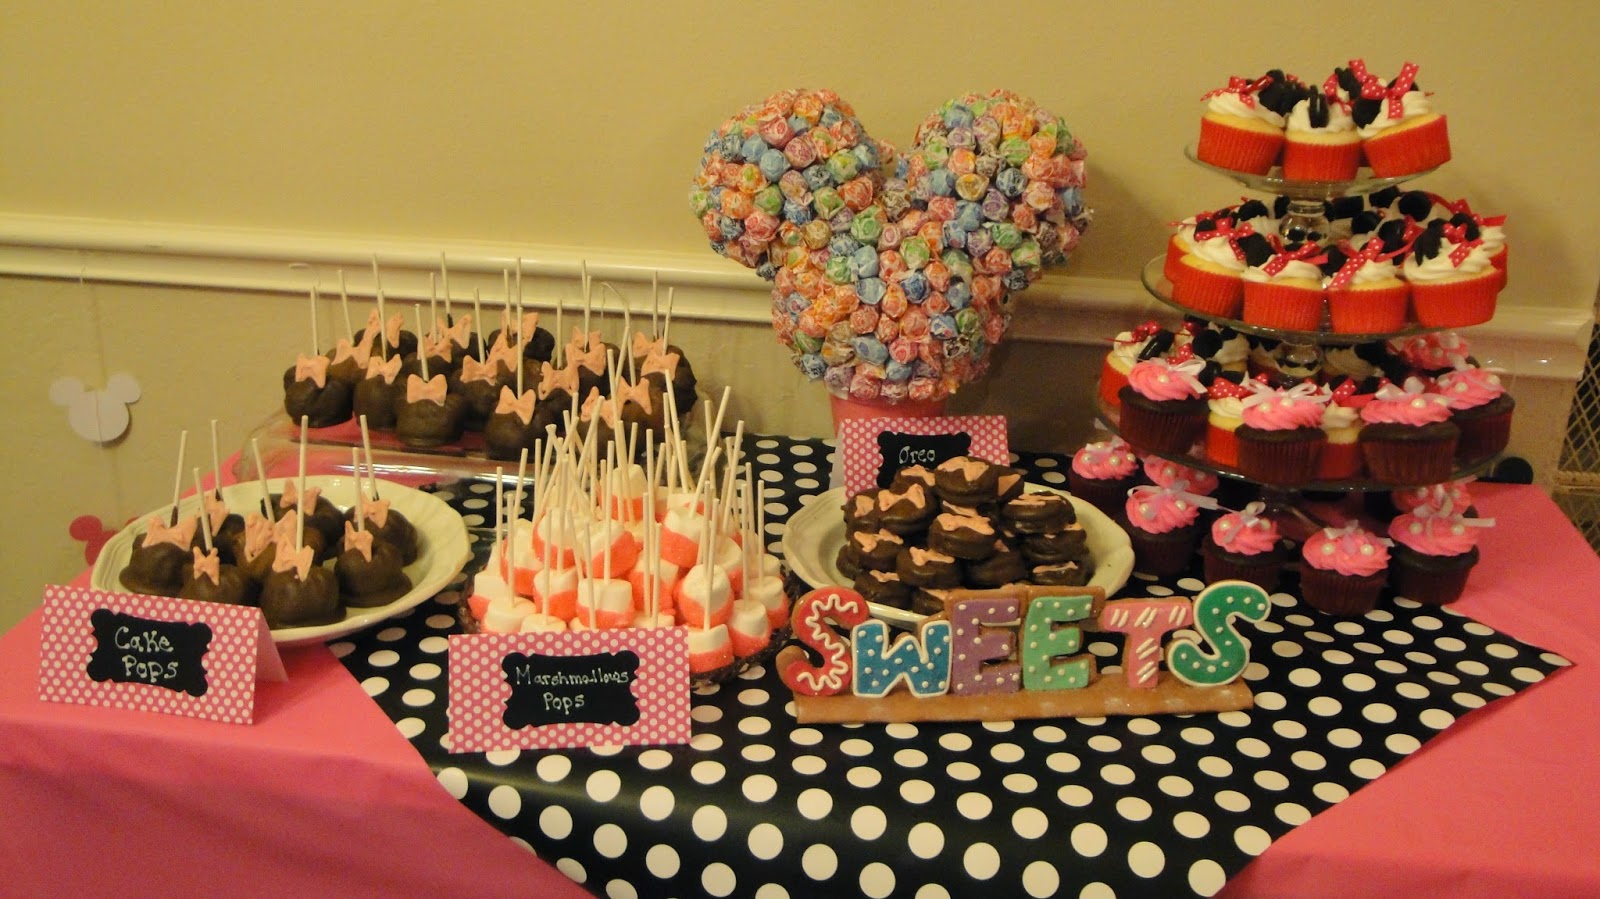
Each element of the food table (with the exception of the sandwiches) were fishing themed. The meat and cheese tray had the pieces cut into fish, the treats ranged from reels and rods, to bait and bass. The cake was done by a local bakery called Cake Junky. The cupcakes and the bobber cake pops were done by a local bakery in Temple, Texas.
 
The drinks were suppose to be "Lake Water" and "Ocean Water" but due to my lack of knowledge in the Kool-Aid industry, I bought fruit punch in a blue packet. I assumed it would come out blue but it was red, so I just said a shark attack had just occurred in the water!


THE GAMES

There were several games the guests played. One was break your water in which each guest was given an ice cube with a plastic baby in it and they had to watch it throughout the shower and once their baby was free from the ice they shouted "My water broke!" and they got a prize. Another game was Price is Right in which I chose baby items and had them displayed and the guests had to write their best guess as to the price of each item; they totaled their sheet and the person closest without going over won. Another game was guessing what the mom-to-be hoped the baby would have as far as features and personality goes. The final game was played during gift opening. Prior to the gifts, each guest wrote down a number on a piece of paper guessing how many times the mom-to-be would say the word "baby"; then while the mom opened presents we counted how many times she said "baby" and the person who guessed the closest won. The prizes for all of the games were small hand sanitizers from Bath and Body Works.
 
The price is right set up


THE AFTER!!


Tuesday, May 27, 2014

Minnie Mouse 1st Birthday Party

My daughter turned 1 in January and I had been planning her first birthday party since she was just weeks old. I LOVE planning parties and I tend to go over the top (not in price though)! Having a child gives me the perfect excuse to plan parties. The theme for her first party was a no brainer for me, Minnie Mouse!!!! The color scheme of pink, black, and white was easy to execute and then add a few bows and Minnie mouse cutouts and you've got the perfect party.

In this post, you will find every element for the party from the decorations to the food and everything in between. I will include what I did to create them. First, let me preface by saying that I have a Cricut cartridge that is Disney theme. It has the classic characters like Minnie and Mickey. I used this cartridge to cut the shapes I needed for the party.

Center Pieces

I made 2 different center pieces for the 4 tables I had in the room. One was a Minnie Mouse Styrofoam head and the other was a ribbon ball. Both were displayed inside a flower pot I painted pink.

For the Minnie Mouse Head:

I hand painted a large Styrofoam ball and 2 smaller Styrofoam balls black
Hot Glue the balls together to form the head
Create a bow to place on top and hot glue
Wrap a Dowl rod with ribbon and place in the bottom of the head and into the painted flower pot (there is a piece of Styrofoam in the pot to hold up the center pieces)

 
For the Ribbon Balls:
I have posted a "How-to" previously and you can find it here!
The thing you need to know is to match the ribbon to the colors you want.

 
To finish off the tables, you can see a polka dot runner: I used wrapping paper to run down the center of pink table cloth.


Other Decorations:

Wreaths for the doors; ribbon wreath and a fabric wreath.

 
Mickey mouse fringe around every doorway and window. I used my Cricut cartridge to cut these out and then glued them along a piece of string.


2 banners; one with my daughter's name and the other says "Happy Birthday"


Large Minnie mouse cutouts to hang on the wall.


Foam #1's; some were decorated with glitter polka dots and others with cupcake wrappers.


30 tissue paper balls hung from the ceiling.

Tutu around the highchair


Dessert Table:

I had a dessert table for everyone to snack on throughout the party. Every dessert was Minnie Mouse themed.


sucker head


Cake balls


Oreo pops


Dipped marshmallows


Cupcakes


Smash Cake (for the birthday girl)


AND THEN THE FINISHED PARTY!!!!


Wednesday, February 12, 2014

Whooo's the Sweetest?

Valentine's Day is sneaking up and here is a quick and easy Valentine you can do for a school exchange or just because you want to give a little something to a few friends!

Materials:
  • 5 1/2 in square piece of colored paper
  • small white piece of paper
  • black piece of paper
  • small orange piece of paper (easy if it's a square)
  • Glue stick
  • pencil
  • medium circle shape (to trace)
  • smaller circle shape (to trace
  • scissors
  • individually wrapped candies

Instructions:
1. Fold your 5 1/2 square piece of paper in half. With the open half pointed away from your body draw a bracket: { just like the picture below
 

2. Now along the shorter side of the folded piece of paper, draw a semi-circle; do the same on the opposite side. See picture below


3. Now cut along  your lines so the finished piece looks like the below picture.


4. Using this as a template, create as many owl faces as you desire.


5. Using the orange piece of paper, you will create a small (in fact it might actually be tiny) triangle. This will become the beak. I made it easier on myself and simply cut off the corners. (See picture below) If you choose to take this route, you will need several pieces of orange paper.


6.Use your 2 size circle items for tracing, and trace 2 of the medium circles on to the white paper, and trace 2 of the smaller circles on to the black paper. (See picture below)This will become your eyes. Cut out the circles.


7. Glue the beak on first, then the eyes.

8. Now you are ready to glue the candy inside. Open up the face, and place a lot of glue on one side. Lay the candy on top and then close the face and press down making sure to seal it so that it will remain closed.


9. On the back, you can write whatever saying you like that pertains to owls: "Whoooo _______". I chose to write "Whoo's the sweetest?"


Happy Valentine's Day!
 
Enjoy your simple Valentine!!!

Welcome to the Mortashed Family!!

I was recently married in February of 2011 and am enjoying newlywed life. My husband and I have welcomed a beautiful baby girl, Adalynn, into our family in January of 2013. She will be the inspiration behind many of my crafty projects. Thanks to my hardworking husband, I have become a stay at home mom while I put my teaching career on the back burner. Being a mom is extremely rewarding and wouldn't trade it for anything. I love crafting, baking, and cooking as a lot of others do as well. My craft projects will be diverse but simple to follow as I have limited time with a baby on hand. I hope you enjoy these Do It Yourself projects and delicious dishes and baked goods!